Today I have a guest blogger who is going to get us organized for our week # 6 challenge!! Andrea from “She’s Crafty: a blog by Retrohipmama” will be sharing how she organizes her photos for scrapbooking. If you do not scrap (I don’t), then this week I challenge you to still get a system together on your computer for your digital photos. Andrea lays it out step by step. Its super easy to follow along. My new macbook pro will be arriving in the mail any day now, and I cannot wait to get my photo organizing ready to go (like the example below). I touched a bit on this in the 21 day challenge, but I know there are a lot of you out there who still need this challenge to get you into gear. Am I right??
If you already have your photos organized on your computer (you go girl), thats great! Link up your blog to the challenge and inspire the rest of us to get busy! 🙂
Week # 5 Challenge:
Preparing your photos for scrapbooking
Before I get started, I have to give a big shout out to Toni for providing all of us a clean and beautiful place to get tidy and organized. Thank you Toni, you are an inspiration!
So let’s get on with some photo organizing, shall we?
Do you spend your precious scrap time organizing supplies or photos? Or even just staring at your photos and paper, wondering what you’re going to do with it all? Are you constantly feeling behind? Check out how a couple hours of prep work can make your next crop super productive!
SETUP MONTHLY REMINDER:
The only way I remember to do something consistently is to have something else do all the remembering. I use outlook so I setup a reminder to UPLOAD PHOTOS at the end of each month. Use whatever method works for you but get it scheduled and make it recurring.
SETUP FOLDER STRUCTURE:
1) Make all your YEAR folders.
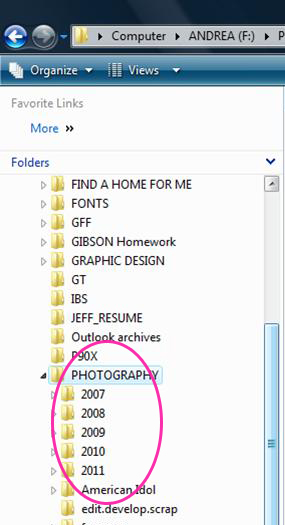 [4]
[4]2) Within each YEAR, make all the MONTH folders. I label mine (01 Jan), (02 Feb) so that they are always in order. Without the 2-digit numbers in the beginning, Windows will sort alphabetically and that makes it hard to locate the months easily.
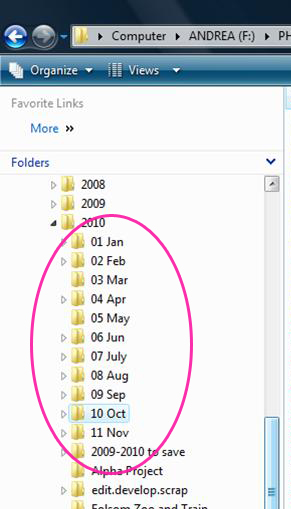 [5]
[5]3) Withing each MONTH folder, make one (edit.develop.scrap.) folder. We’ll get to this a little later but it’s a pretty important step.
4) The DATE/EVENT folders will get created as you store/file your photos. Mine are labeled like this (10.4.2010 – Marshall 3yr Photo Shoot)
TRANSFER PHOTOS FROM CAMERA: 15-60 minutes
When your monthly reminder hollers…just make the time to do it. You’ll be glad when you can be on top of it and it won’t be an overwhelming task. Just put that folder view into Details mode and move all the pictures from the previous month into the corresponding month folder. And look…its already created for you!
Here’s where you’ll need to spend some time so grab a Coke and throw on an awesome playlist in iTunes and enjoy the fruits of all your shutter-some labor.
1) Keeping your view in Detail, you should be able to see the Date Picture Taken column. (if you don’t know how to do this, I can explain it) | Or if you like to see the pictures to know what event or date they belong in, change it to the Thumbnail view. It doesn’t matter, you’ll end up in the same place.
2) Start by making the DATE/EVENT folder and toss those pics in. Even ones you know you’ll toss, just get them in there. Do this for each DATE/EVENT for that month.
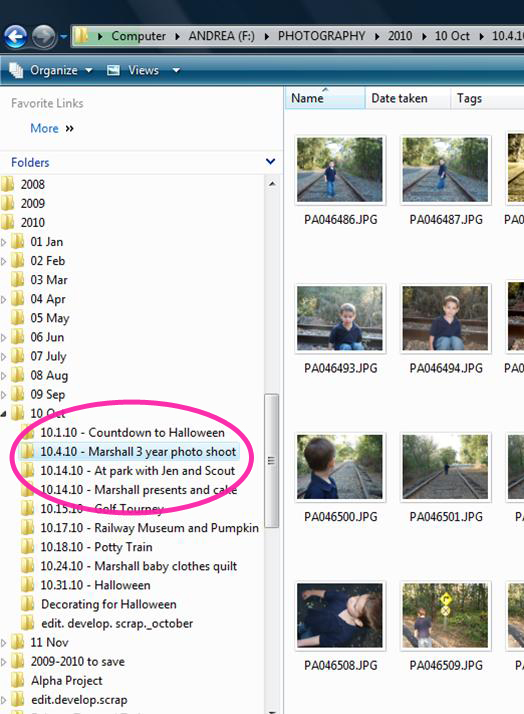 [6]
[6]3) Once there are no more pictures hanging outside of a folder (like a hallway rebel who’s not in class yet), you can begin determining which pictures are scrap worthy. (Sometimes if I do have wandering photos, I will create a RANDOM folder for them.) Just go through each EVENT folder and copy/paste the pictures you want into the edit.develop.scrap. folder. The COPY/PASTE part is essential. The goal here is to keep all the originals in their respective folder and only edit the copies that are in the edit.develop.scrap. folder.
4) Do this for each EVENT.
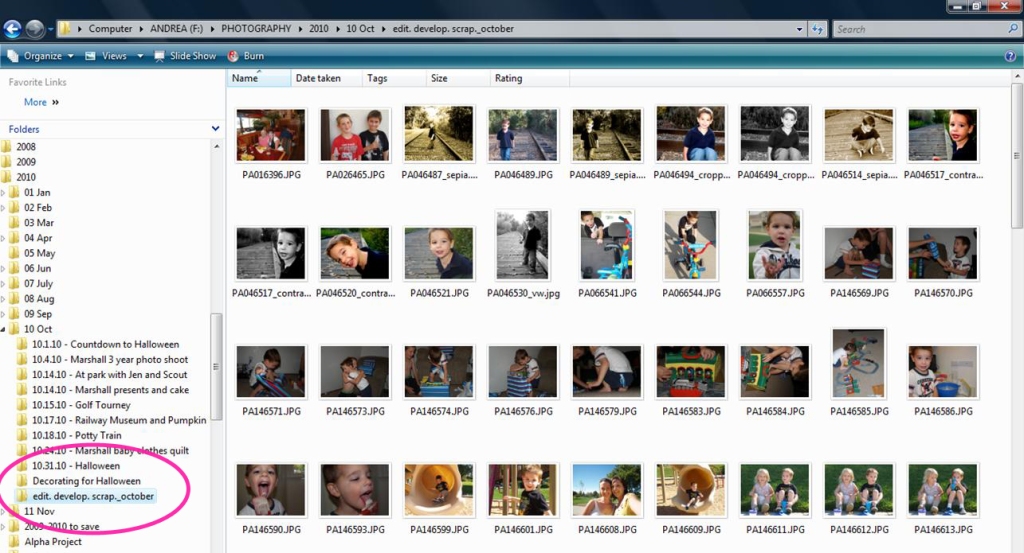 [7]
[7]EDIT: 10-60 minutes
You know you better than I do so spend as much time editing your photos as you want. I’m not here to tell you how much or how little to edit….so get your photoshop up or just crop some photos. It’s totally up to you at this point.
DEVELOP: 15-30 minutes
Another section where you get to do what you normally do. I develop my photos as SAMS CLUB, only because they do 1-hour developing and the prices are great. Sometimes they crop the photos oddly so I’ve been a bit irritated at times. But it’s important to not stop at this point. GET YOUR PHOTOS DEVELOPED! It’s the only way they’ll get into your scrapbook….no magic photo fairy will get them there for you. =) Honestly, I develop my photos about every 3-4 months. I do not do this part each month.
Are you ready for my crazy insane page planning? Okay here goes.
Get your photos home.
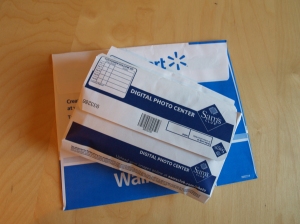 [8]
[8]Separate them into piles by event.
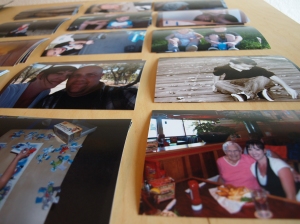 [9]
[9]Find inspiration.
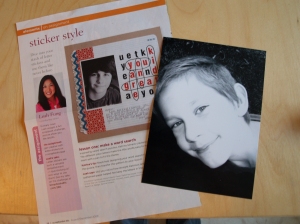
I use a binder of scrapbook layouts I’ve collected from magazines. (Sometime soon I will do a separate post on this binder…it really needs to be updated.) I file them into categories and then I use numbered tabs to separate them by the number of photos in the layout.
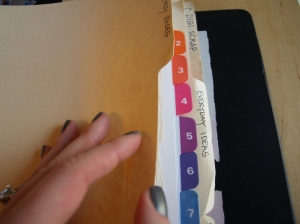 [10]
[10]I select one stack of photos, then browse through my layout options (by number of pictures or by the idea or whatever) until I find one that fits the feel or color scheme I am looking for.
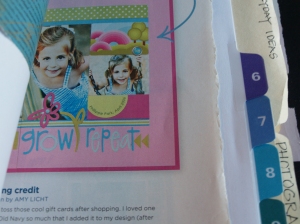 [11]
[11]This one is perfect! It usually doesn’t take long. For me it one of those ‘I’ll know it when I see it‘ things.
 [12]
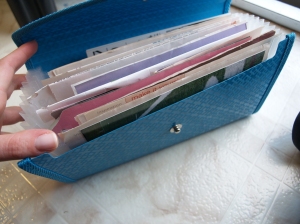
[12]Here’s my accordion file I use to store my photos and layouts. It’s a serious upgrade from the ugly brown marble one I have been using and it’s the perfect size for 4×6 and 5×7 photos.
 [13]
[13] [14]
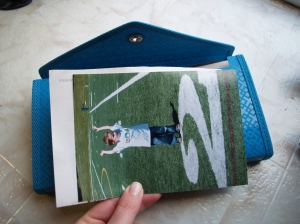
[14]I now fold the layout in half, place the photo in front and drop it in an open space.
 [15]
[15]I can probably store up to 20 layouts at a time.
 [16]
[16]NOW YOU GET TO GO SHOPPING!!!! Take your photos to scrap file, your best scrappin’ buddy and head to your favorite store. Don’t forget to leave the hubby and kiddos at home!
Here is where you may get funny looks while shopping. I actually bring the file with me and I seriously bust out the photos and layout samples while I shop. My reasoning is this: I do not want to buy more or less than what I need to complete my desired layout. So, if the layout I have chosen utilizes 5 different patterned paper and a solid background, then that’s what I’m going to look for while I’m searching for paper that also compliments my photos. You will not see me just picking up paper that I think is cute or is simply the right theme. I try to put a little more thought into it and preparing ahead of time allows it to be possible. People will look at me funny at first, but when they realize what I’m doing, I think they see the logic. That makes me smile.
I am a scrapbooker…not a collector of scrapbook supplies.
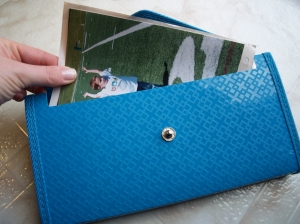 [17]
[17]So, $60 or $70 later (which is what I spend about 3-4 times a year)…you have a bag full of pretty little papers and embellishments that are absolutely perfect for your photos.
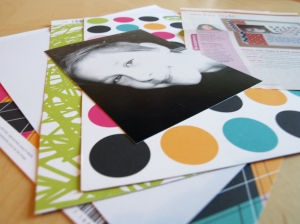 [18]
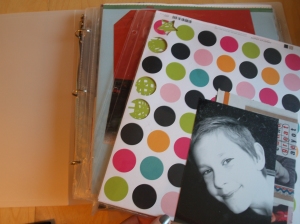
[18]Once I get home, I grab my photos and papers and IMMEDIATELY stack the papers + embellishments + photos + layout together. If I wait…I forget. Then each set gets stored into a sheet protector.
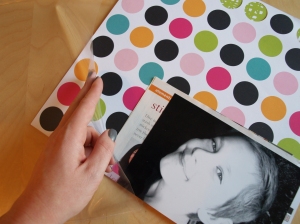 [19]
[19]Look at that! It’s a layout that is ready to go! I know it feels like it took a long time to get here…but once you get the system down…it’s easy peasy!
 [20]
[20]Years ago, Target sold these fabulous plastic 12×12 3-ring binders. They were a mere $8 at the time and I picked up 3. 1 is for embellishments, 1 is for pages to fix or re-do and this one is for CURRENT PAGES TO DO. This is where you will put all your completed layout sets.
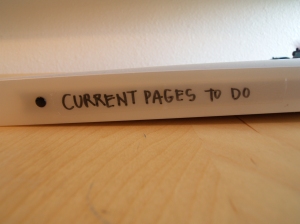 [21]
[21]Mine is always full and I hope it stays that way for a long time! =)
 [22]
[22]HAPPY SCRAPPIN’!
Here are a few rules I scrap by:
1) I don’t scrap everything.
2) I don’t scrap in chronological order.
3) If I attempt to scrap photos 3 times without finishing it…I just store the paper away and put the photos into a box that I will later use for mini books or gifts later. If I am not inspired…it will not be a good layout.
4) there is no right way to scrapbook. these are your books and whether you use no embellishments or top notch supplies…your family will cherish them forever.
***THIS GIVEAWAY HAS ENDED***
What’s a challenge without a giveaway??
This week to go along with the scrapbook & photo theme, I am giving away…
A {Power Sort Box [24]} by Creative Memories (A $28.50 value)
 [25]
[25]Includes:
- 1 Power Sort Box
- 6 Compartment Boxes
- 2 Compartment Box Covers
- 6 Power Sort Dividers
- Inside cover storage sleeve
- Instruction Booklet
Features:
- Photo-safe
- Holds up to 1,200 5×7 photos
- Inside cover storage sleeve holds photos and memorabilia up to 12.75×7 in size
- Dimensions: 13×7.75×5.75
- Removable Compartments and Dividers
- Compartment Box Covers allow you to transport up to 400 photos
- ID Pocket on Front
- Ships flat, assembly required
- Additional Dividers sold separately
Stephanie’s Power Sort Box (Very organized)
 [26]
[26]
AND
Memory Manager Software [27] by Creative Memories (A $39.95 value)
 [28]
[28]Includes:
- Software on CD
- CD Case
- QuickStart User’s Guide
Features:
- Organize your digital images from digital cameras, scanners or CDs using virtual Power Sort Boxes
- Store digital images and journaling with the exclusive Memory Vault feature
- Organize and store your audio (.mp3, .wav, .wma) and video clips (.avi, .wmv, .mpg, .mp4, .mov)
- Image enhancement features such as color correction, red eye, cropping and much more
- Preplan your PicFolio Albums and journaling
- Produce album-ready photos and journaling boxes
- Print your digital images online or at home with the click of a button
- Keep track of printed or non-printed photos using the one-of-a-kind PrintTrack feature
AND
A custom edit of any photo of your choice. All you have to do is send me your un-edited, un-shunk, digital photo and I will professionally edit it for you!
 [29]
[29] [30]
[30]
Not only am I giving those away, but Stephanie has offered a great special to A Bowl Full of Lemons readers!
All Bowl Full of Lemons readers will receive 20% off their ENTIRE purchase from stephanies Creative Memories website!! {Here [31]} is her website for you to visit. In order to receive the 20% discount, YOU MUST email your order to Stephanie at smlowe5.cm@hotmail.com [32]. The 20% discount is through March 31st. Let her know you are a BFOL reader.
To enter the giveaway, all you have to do is:
1. Be a follower of A Bowl Full of Lemons
2. Visit Stephanies website {
here [31]} and comment back here on what you like!
*For an extra entry, you can join the challenge this week! (and “attempt” to organize your digital photos) 😉
The winner will be chosen via random.org, by your comment #. You MUST be a BFOL follower to qualify. US residents ONLY please.
Stephanie also has a great blog {
here [33]}. Don’t forget to visit it as well!
Good luck! The giveaway ends at 11:59 pm on 3/8.
If you would like to join the challenge this week or if you are already organized with your digital photos, link up your blog below and don’t forget to add my button to your blog!
 [34]
[34]


